About Me |
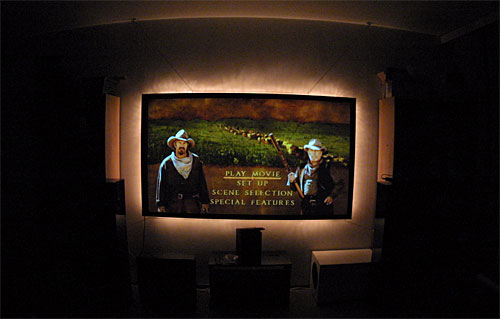
DIY screen for home theaterThe needAfter using two weeks white roll curtain I realised that darker (=gray) screen would provide better contrast. I also needed dark border around the screen. After studying my option (reading different forums, mostly Finnish DVD plaza, I realized that I have to buy 1000 EUR premade screen or do it by myself for 50 EUR price. Also it seemed that most users with painted gray screen were very pleased to the results. So the selection was nobrainer... DesignTHX standard defines that recommended viewing angle should be 36 degrees. Minimum accepted angle is 26 degrees. In my living room the watching distance is 300cm to 320cm depending how you sit. From these numbers we can calculate following table:
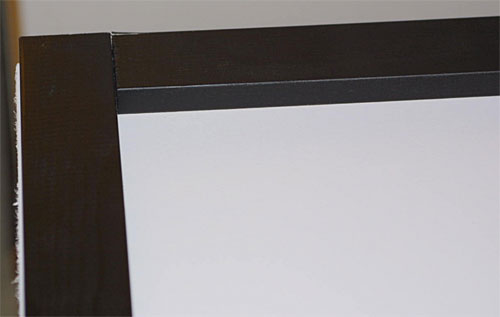
Since the distance from back wall to front wall is fixed I tried various sizes using the zoom of projector and the size when the zoom is in maximum tele position seemed the best. I measured the screen size on this configuration and I got dimensions 184cm x 103,5cm. To be on the safe side I enlarged the final screen dimensions to 188,5cm x 106cm (diagonal 216cm = 85inch which equals the are of seven 32 inch widescreen TVs IF the 32" TVs would show picture of 32 inch instead of having 32 inch picture tubes). The horizontal viewing angle is between 34,8 and 32,8 degrees. I decided to use 40mm x 15mm cleats around the screen. From these dimensions I did know that the screen has to be 8cm bigger in both directions than the picture size. But since there were no 40mm cleat, I had to use 45mm cleat instead. Unfortunately the hardboard have been already cut to the dimensions :-( fortunately black borders around the screen can mask the incorrect aspect ratio pretty well. Components needed for the DIY screen
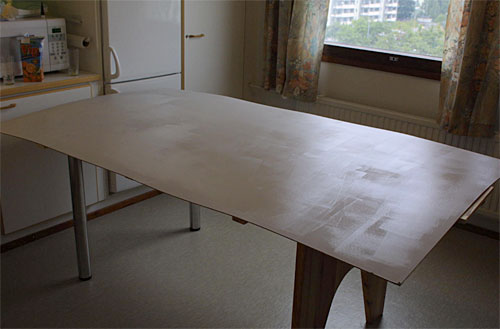
From K-Rauta Rauta-Otra (EUR): Building and installationWoodworksI purchase the board and cleats precut and therefore no woodworks needed to be done. PaintingPainting of the screen was done with paint roller (styrofoam). Three layers of paint was painted, between each layer I kept one hour drying period. The cleats were painted with spray on my balcony. I sprayed whole spray bottle in one painting session.
AssemblyBackside braces were glued to the hardboard one night before the actual painting. After the painting the cleats were screwed to the board. All screw holes were predrilled.
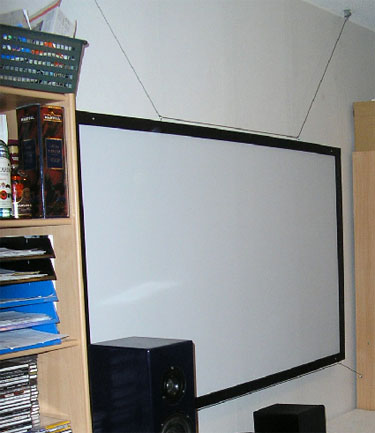
InstallationBecause of the roll curtain I had clamps in the roof, which also could be used for hanging the screen. I used wire locks to adjust the screen height.
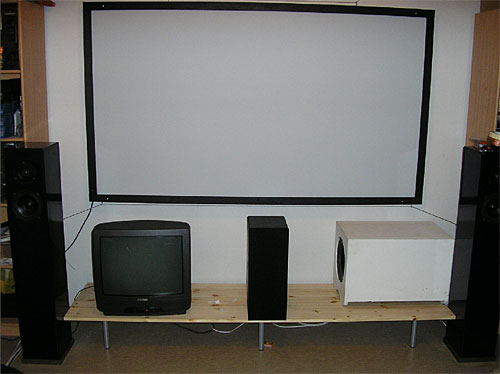
ResultsI have been quite happy with the screen. Only problem has been that the screen bends when the paint is drying. The center of the screen is about 3 cm nearer to the projector than the corners. |